SSH config and login to UI via Jumphost for users on Windows
The instructions below assume:
- you've already downloaded MobaXterm to generate a pair of SSH keys (using the instructions for requesting accounts)
- and verified your MobaXterm version is 12.3 or newer (older ones have a known bug and won't work.)
- and will now use MobaXterm to login to the cluster
- and that you received a notification with your account name and that your account has been activated
- and that you are on the machine from which you want to connect to the cluster.
If you prefer another terminal application consult the corresponding manual.
Launch MobaXterm and create a new session
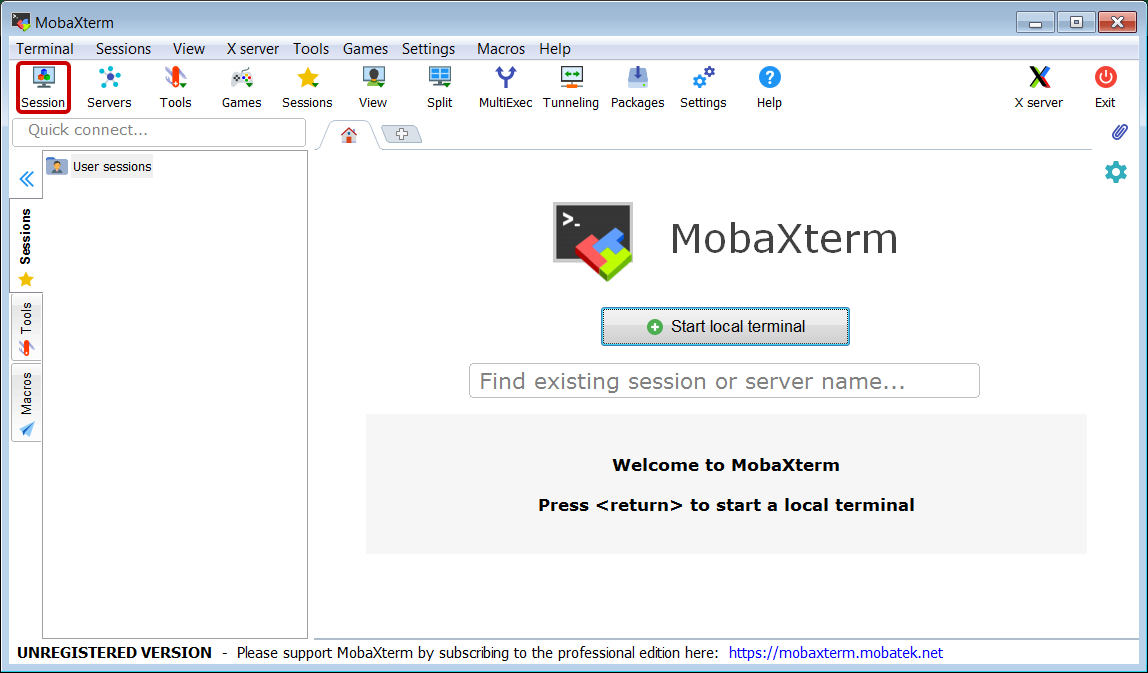
- Launch MobaXterm version 12.3 or newer and click the Session button from the top left of the window.
- A Session settings window will popup.
Configure a new session
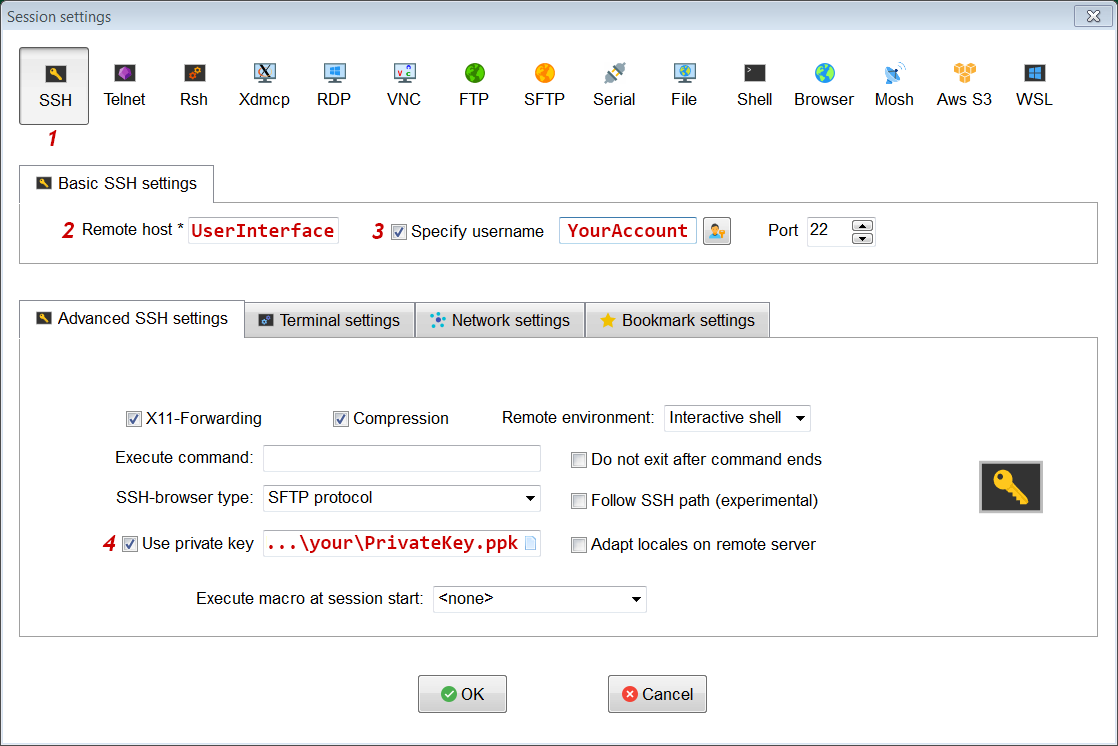
- Session type
- 1: Select SSH.
- Basic SSH settings tab
- 2: Remote host field: Use the name of the User Interface (UI) nibbler .
- 3: Specify username field: Use your account name as you received it by email from the helpdesk.
- Advanced SSH settings tab:
- 4: Use private key field: Select the private key file you generated previously.
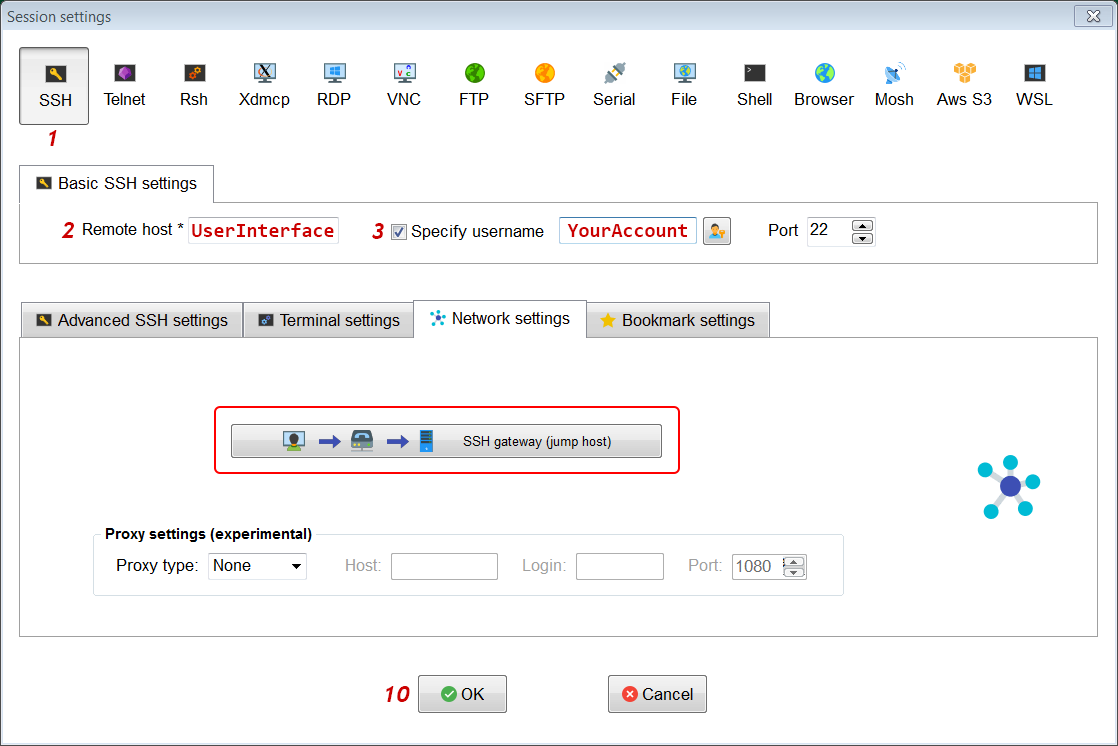
- Network settings tab
- Click on the large SSH gateway (jump host) button.
-
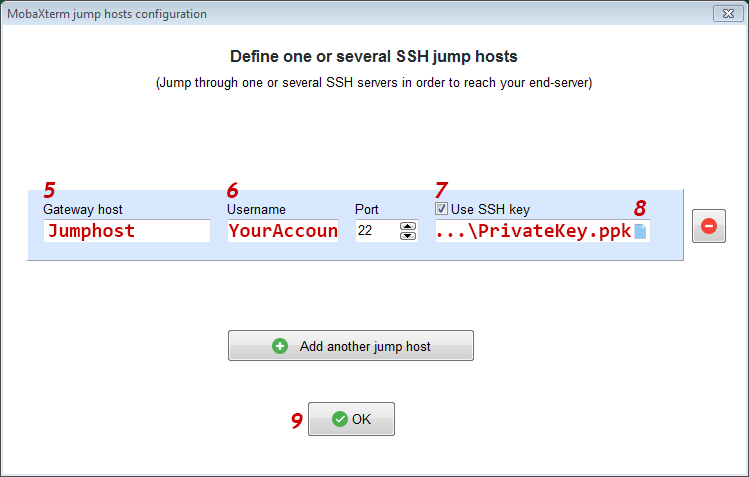
SSH jump hosts popup window
- 5: Gateway host field: Use tunnel.hpc.rug.nl for the Jumphost address.
- Optional: Port field: The default port for SSH is 22 and this is usually fine. However if you encounter a network where port 22 is blocked, you can try port 443. (Normally used for HTTPS, but our Jumposts can use it for SSH too.)
- 6: Username field: Use your account name as you received it by email from the helpdesk (same as for 3).
- 7: Select Use SSH key and
- 8: Click the small button to select the private key file you generated previously (same as for 4).
Important: the path to the selected private key will be shown. Depending on how you browsed to the private key file, the path may- Either start with a drive letter, colon and single backslash.
E.g.H:\path\to\private_key.ppk
This is fine and should work. - Or start with two backslashes.
E.g.\\path\to\private_key.ppk
This won't work and MobaXterm will fail silently: no login, no error, no nothing.
Use a different route in the GUI to browse to your private key file such that the path starts with a drive letter, colon and single backslash.
- Either start with a drive letter, colon and single backslash.
- 9: Click OK
-
Back in the network settings tab
- 10: Click Ok
Password (popup)
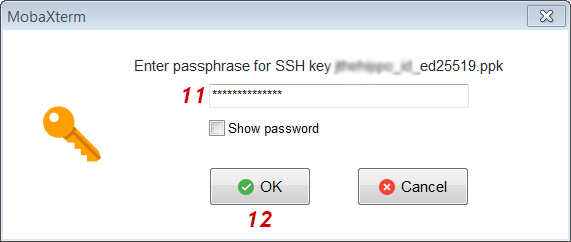
- MobaXterm should now produce a popup window where you can enter the password to decrypt the private key.
- Note this is the password you chose yourself when you created the key pair.
- You are the only one that ever knew this password; we have no copy/backup whatsoever on the server side. If you forgot the password, the private key is useless and you will have to start over by creating a new key pair.
Password again (prompt)
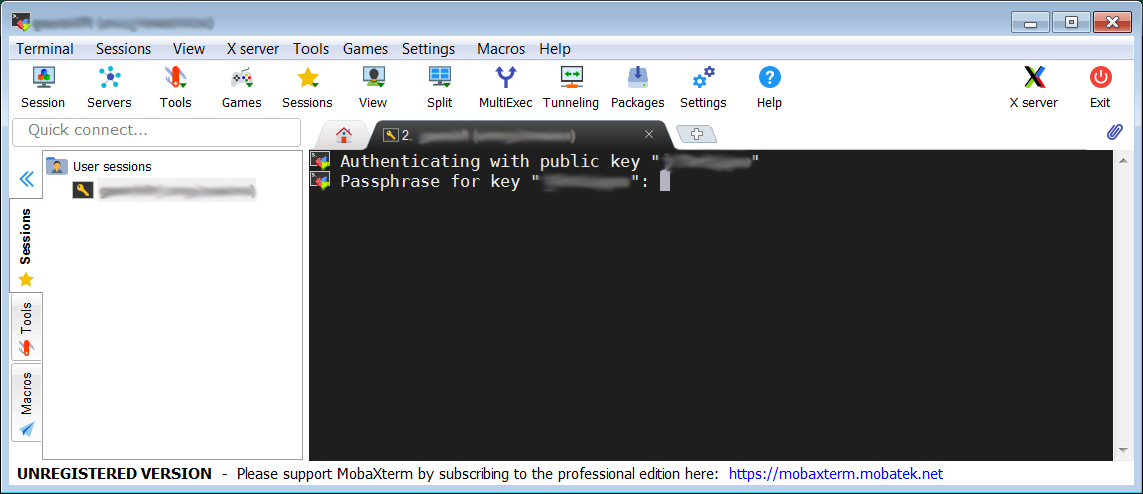
MobaXterm should now start a session and login to the Jumphost resulting in
- a session tab (left part of the window with white background) and
- a terminal where you can type commands (right part of the screen with black background).
In the terminal tab MobaXterm will try to login from the Jumphost to the User Interface (UI) with the same private key file. This may require retyping the password to decrypt the private key a second time, this time in the terminal tab.
Session established
You have now logged in to the UI nibbler.
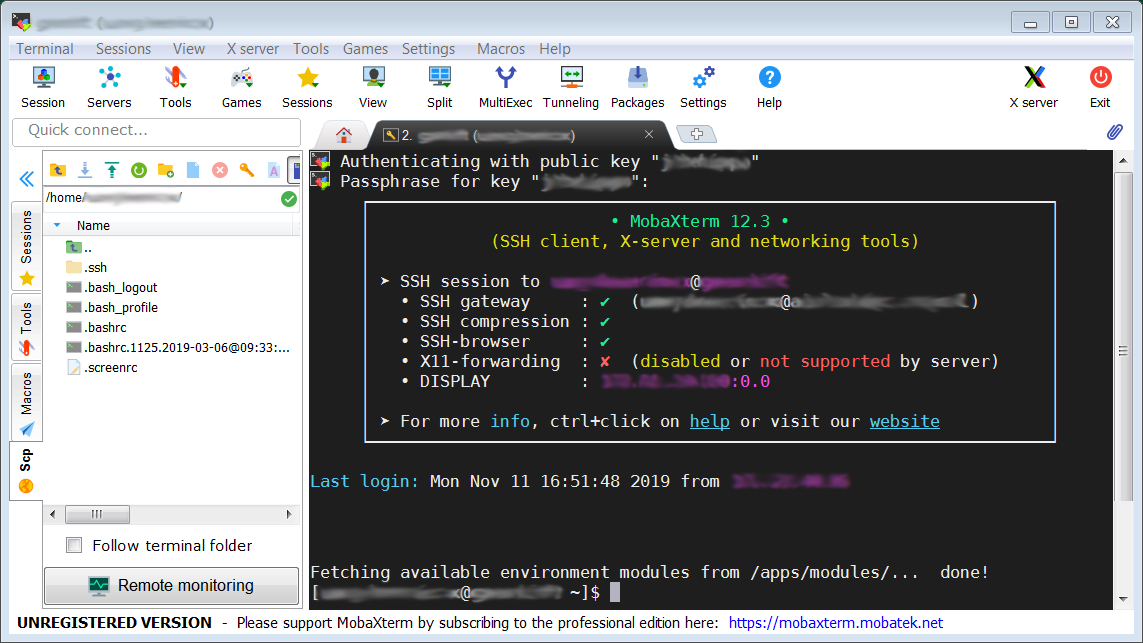
The left part of the window with white background switched to a file browser, while the right part remains a terminal where you can type commands.
Back to operating system independent instructions for logins