SSH client config for users on macOS
The following assumes:
- you have a
${HOME}/.sshfolder with SSH keys (as generated using the instructions for requesting accounts) - and that you received a notification with your account name and that your account has been activated
- and that you are on the machine from which you want to connect to the cluster
- and that this machine runs macOS Sierra 10.12.2 or newer, which includes OpenSSH 7.3p1 or newer.
Older versions lack several OpenSSH features we need and are incompatible.
1. Configure your SSH client
We've compiled an AppleScript app to configure your SSH client, which will:
- Create an SSH client config from scratch if none exists.
- Append to an existing one leaving the config for other servers/machines untouched.
- Update the config for Hyperchicken if the app is executed again.
Quick Install
- Download the zipped ssh-client-config-for-hyperchicken AppleScript application.
- Locate and unzip the downloaded archive, which will result in an
ssh-client-config-for-hyperchickenapplication
(optionally with.appextension depending on your display preferences). - Start the
ssh-client-config-for-hyperchickenapp by double clicking in theFinderapplication. - Follow the instructions ...
Check the Detailed Walkthrough below if you experience problems or skip to the Log in to Hyperchicken section.
Detailed Walkthrough
The ssh-client-config-for-hyperchicken app is a wrapper for an installation script that will be executed in the Terminal application.
It will configure your SSH client by:
- Adding an
Include conf.d/*directive to your main${HOME}/.ssh/configfile - Adding a
${HOME}/.ssh/conf.d/hyperchickenconfig file for the Hyperchicken specific code.
The ssh-client-config-for-hyperchicken app will guide you through the following steps:
- Depending on your macOS version, you may receive a pop-up requesting permission to allow access to the
Terminalapplication:
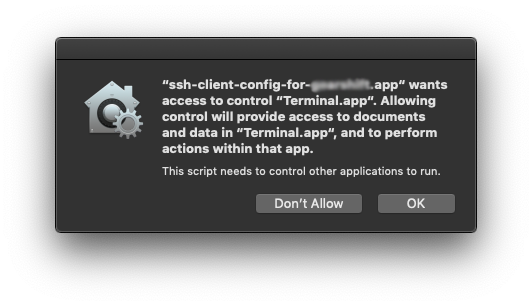
Click Ok to allow access to theTerminal.
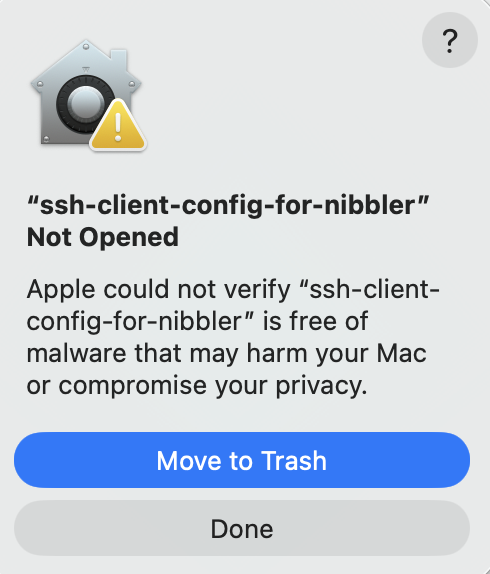
If you want to revoke this permission or change it back to allow later on, you can do so in System Preferences -> Security & Privacy prefs -> Privacy tab -> Automation - From MacOS version 26 onwards it is not possible to install/open the
ssh-client-config-for-hyperchickenapplication directly.
The first time you try to start thessh-client-config-for-hyperchickenapplication there will be an error message like this:
Next, go to System Settings and scroll until you find the Security & Privacy section and look for thessh-client-config-for-hyperchickenapplication:
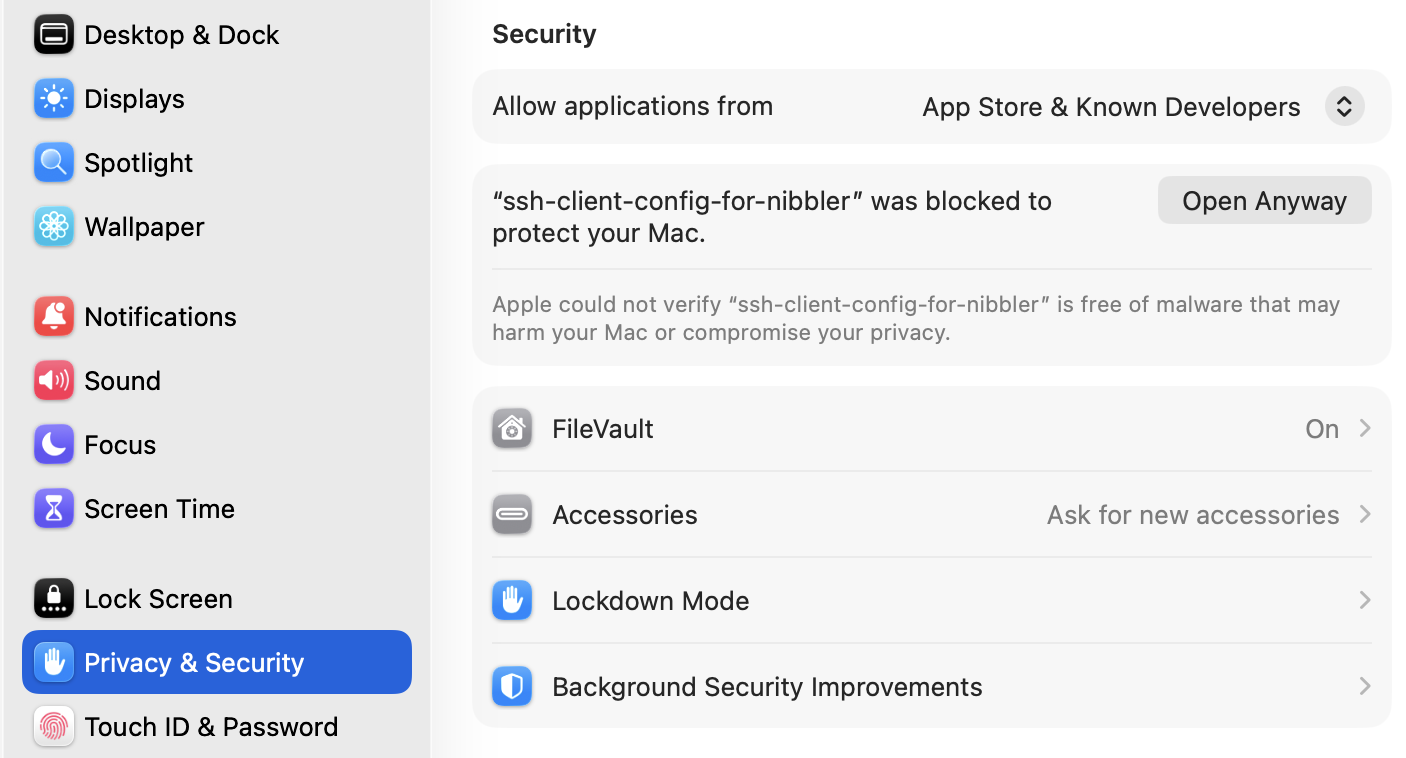
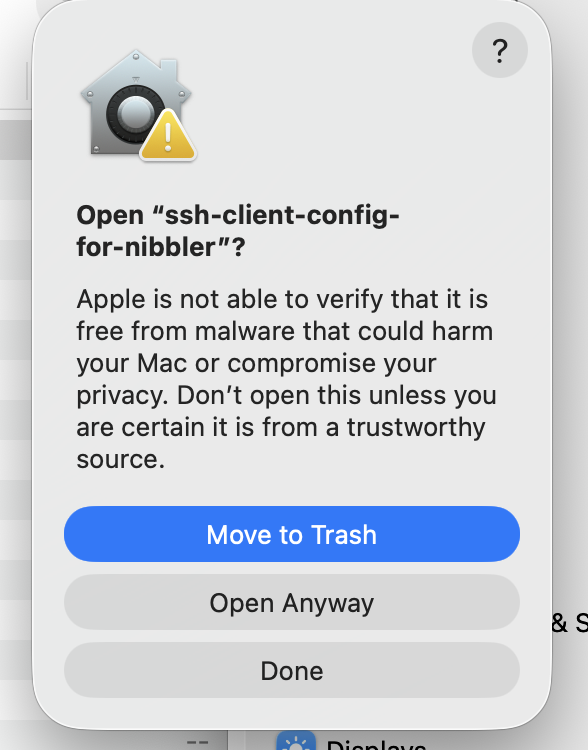
Click onOpen Anywayand you will get a popup window where you need to selectOpen Anywayagain:
- The
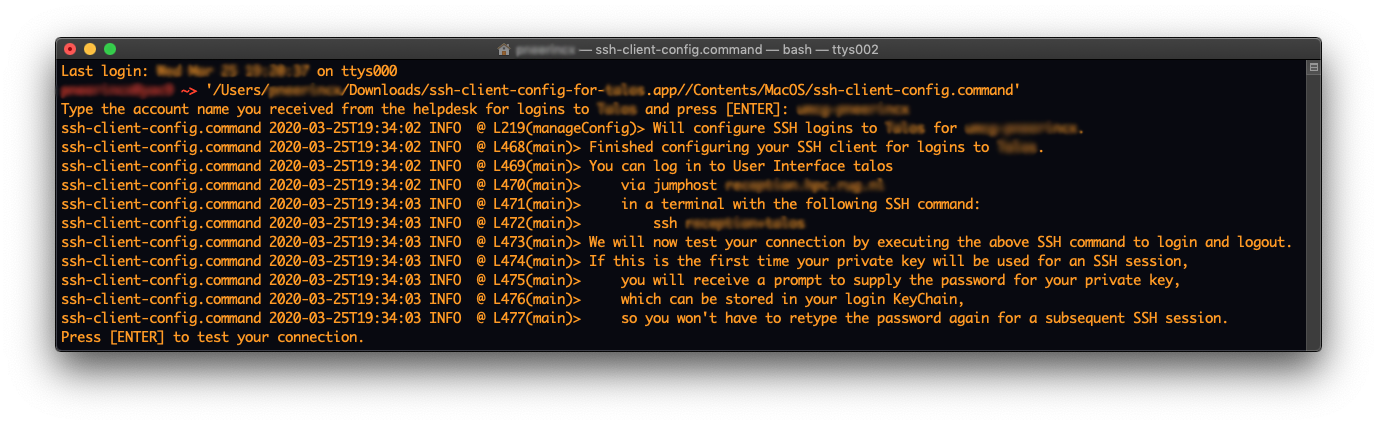
ssh-client-config-for-hyperchickenapp will open the configuration script in theTerminalapplication and prompt for your account name.

Type your account name as you received it from the helpdesk and hit the [ENTER] key on your keyboard.
Optionally you can specify an alternative location for your private key file.
(Just hit the [ENTER] key to use the default private key file path.) - Your SSH client will now be configured for logins to hyperchicken via the corresponding jumphost
followed by a connection test: the script will try to login using the created config with the account you supplied and the ssh command
ssh portal+hyperchicken
Make sure you are connected to the internet and hit the [ENTER] key on your keyboard to start the connection test.
- If this was the first time you use your private key for an SSH session, you will get prompted to supply the password for your private key.
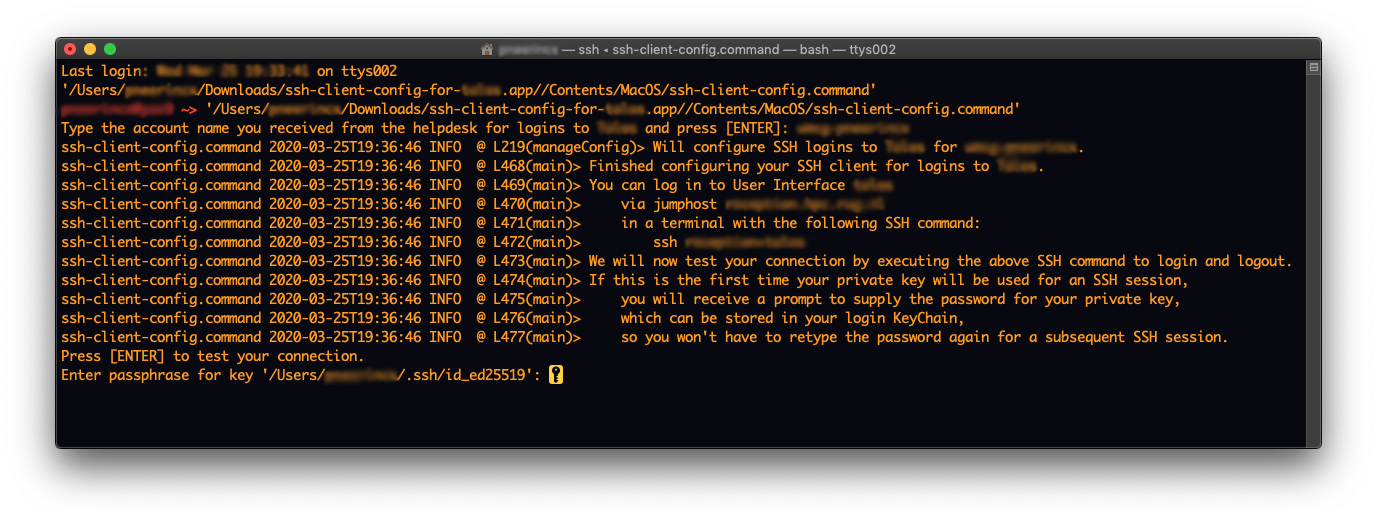
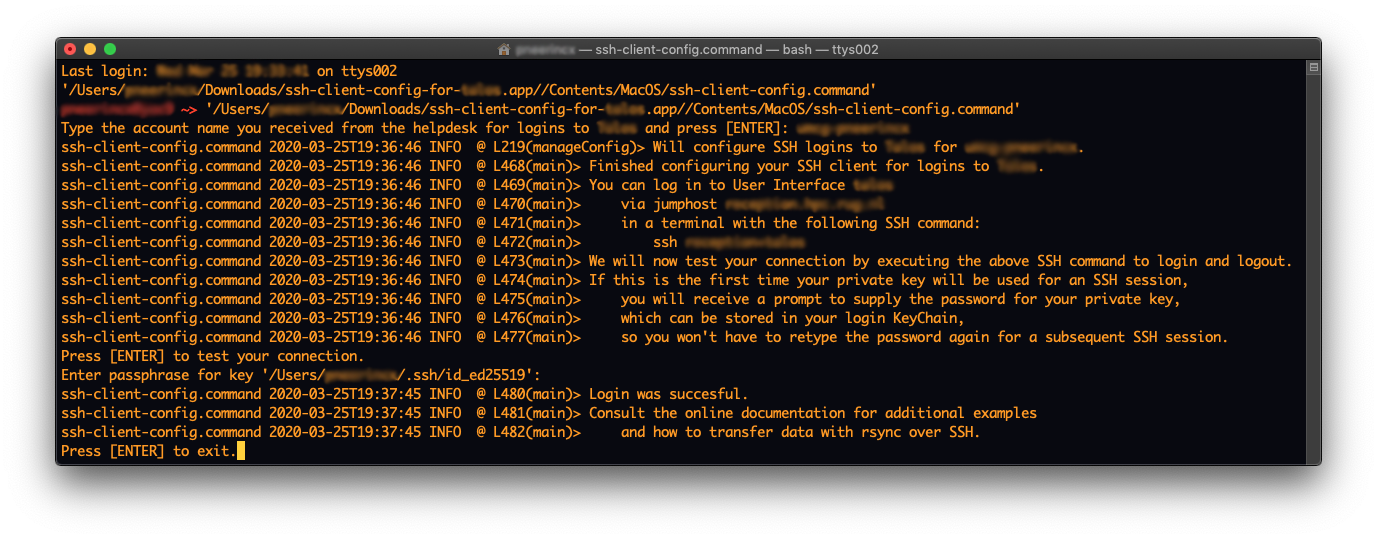
Note that this is the password you chose yourself when you created the public private key pair. We have no backup whatsoever; If you forgot the password, you will have to start over by creating a new key pair. - Done! Hit the [ENTER] key on your keyboard to exit the configuration script.
- If you made a mistake, you can simply run the
ssh-client-config-for-hyperchickenapp again to update/fix your config.
2 Login
You can now use the config and login with your ssh client
Back to operating system independent instructions for logins